Introduction
The Steam Deck is a device that I became fascinated with instantly since it was announced. After using my LCD model for some time, I dived into the rabbit hole of modding it. I decided to write a comprehensive post about all the possibilities. Sit back, sip on your tea, and enjoy.
Accessories
Having useful utilities for your deck can greatly enhance your enjoyment of using it.
SD Cards
If you’re on a budget like me, you might have purchased a low-end 64GB (or lower storage in general) unit and simply need more space. The easiest solution is to buy an SD card and insert it into the easily accessible slot. Personally, I’ve had great experiences searching on Amazon for my desired size. It’s important to find one with adequate speed and capacity. Some even have “Steam Deck” in their description, which is usually a good sign. Nonetheless, don’t forget to check the reviews.
Another interesting method I’ve come across is using “cartridges”. Essentially, people purchase small-sized SD cards, print game covers, and load one or more games (e.g., a trilogy) onto each SD card. It’s convenient that the Steam Deck hot-reloads once a new SD card is inserted. Just ensure your preferred game is stored on the specific SD card. While I find this idea cute and awesome, it could be quite costly and require a case to hold them all.
Here is a video showcasing it:
Hubs
If you find yourself in need of more IO (e.g., to connect a monitor or mouse and keyboard), investing in a dock is advisable. It ultimately comes down to whether you choose the official route or opt for a third-party option. Frankly, I recommend going for a third-party one. The official option is undoubtedly good, but the price, at nearly 100 bucks (in my region), is quite steep. Valve has worked extensively to ensure the deck is compatible with various docks, most of which (realistically, all) should work as well as or better than the first-party one, often at lower prices.
Here’s a video from Cryobyte33, providing excellent technical content for the Steam Deck in Generell:
Controllers
If you want to use controllers instead of the built-in input, simply use the one you already have or the one you’re accustomed to. That might sound a bit simple, but honestly, it’s the way to go. The Steam Deck supports virtually every controller out there, including excellent Bluetooth support. So, if you’re a Nintendo fan, a PlayStation person, or an Xbox human, just use what you know.
Cases
If you’re like me and hold your Steam Deck very preciously, you may want a case. This is great for traveling or if you desire extra features like a kickstand. Since the OLED version maintains the same form factor as the old LCD model, both versions are compatible with every Steam Deck case being sold. Personally, I have a see-through hard plastic one, but you may look into getting different designs.
Dbrand is a popular (though pricey) awesome seller who offers well-made and highly reviewed cases and skins.
Hardware Modding
Anything that involves opening or modifying the deck I would classify as hardware mods. These can vary in ease and will most likely void your warranty. Also PLEASE REMOVE ANY SD CARD FROM THE SLOT BEFORE OPENING THE DECK!
Expanded Storage
Even though the built-in SD card slot allows for easy expansion of storage, sometimes it’s just too slow or not enough space. Expanding the storage by replacing the SSD is a (relatively) easy task to do. There are many tutorials online that you can easily follow. You should keep in mind that iFixit is a wonderful source for such operations:
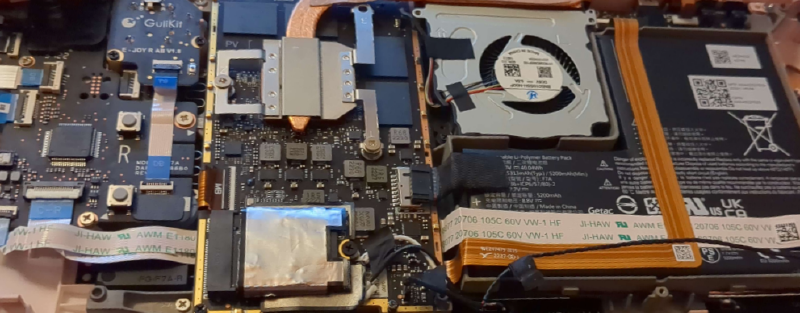
Hall Effect Joysticks
This upgrade is probably most beneficial for those whose joysticks malfunction or are very sensitive to dead zones. For those who don’t know, dead zones are like the space around the center of a joystick where it doesn’t respond to tiny movements, acting as a buffer to prevent accidental actions or shaky controls, resulting in (potentially) smoother gameplay.
Hall Effect joysticks from Gullikit can minimize the dead zone and have a longer lifespan compared to non-Hall Effect ones. If you don’t have any problems with your current ones, I would recommend waiting until you do, since you probably won’t notice much difference.
Here is a replacement guide:
Repaste
If you aren’t too technical, this might sound a bit weird, but it’s probably the best way to ensure longevity and a cool device. After some time, the old cooling paste can need replacement and may perform poorly, which means your fans will run louder and faster, draining more battery, and your device will become hot. Repasting involves removing the stock thermal paste and replacing it with new paste or pads, which you can buy at your local computer store or order online.
Personally, I’ve been using PTM 7950, which I ordered from Amazon. It’s a relatively new kind of cooling paste that works really well. Be aware that if you use it as well, look out for scams since they occur a lot.
Here is a guide on how to apply it (or any paste, really):
Shell Replacement (LCD only)
Okay, this is pretty much the most invasive thing you can do.
I would recommend that if you’re not that tech-savvy, think about this twice. Replacing the back shell is relatively easy and something many people have done, it’s an awesome way to make your deck look different. Some even come with improved cooling capabilities. JSAUX is probably a good option here.
If you want to replace the front as well, you’ll be in for a ride, buddy. Replacing the front shell includes disassembling the whole device to every part and then doing that again in reverse. Also, getting the screen off from the old shell is really intense. If you’re really trying to get through with this, I would recommend getting the iFixit iOpener kit to help with the screen. Personally, it took me about 6 hours to complete, and I’m fairly happy with the result. I got mine from Extremerate.
They have a tutorial on how to do it with their kit:
Fan Replacement
If you are noise-sensitive and have an older Steam Deck model, you may want to look into getting a different fan. There are multiple fan models available, some of which are confirmed to be quieter. You can order them from iFixit if available. Before you buy, check first if you have the old one.
For more details, check out this video:
Screen Replacements (LCD only)
The biggest downside regarding the LCD Deck is the screen. An 800p LCD panel may not suit everyone’s preferences. Personally, I love the experience nonetheless and don’t want an OLED. But for those who can’t afford to buy an OLED but desire a better screen, DeckHD may be an option.
DeckHD is a company that sells an HD LCD panel with better color saturation than the original screen. While this option may sound great, it has many drawbacks. You need to go through a lot of steps to physically change the screen, which is very time-consuming and may be risky. Additionally, you need to flash the BIOS to make it function as intended, and the software may be affected by the larger screen. Moreover, the performance, especially for AAA Games, is noticeably worse.
While you sacrifice many aspects that I personally would prefer to have, the biggest hurdle is that you are 100% dependent on a company that provides BIOS patches, which may end at some point. Furthermore, there seems to be some drama and poor customer support surrounding the project, especially since the OLED model was announced.
If you would like to look into the project more, you can watch YouTube videos or join their Discord and ask directly:
Software Modding
Software modding is usually an easy and non-invasive way to mod your Steam Deck.
Emulators
First of all, emulators work extremely well on the Steam Deck. With EmuDeck, you can easily install plenty of well-known, trusted emulators, and they will be automatically configured to work best on your device. I would recommend looking through their website EmuDeck and following their instructions.
If you are searching for a way to transfer your legally dumped ROMs onto the deck, my recommended method is KDE Connect. Set it up on both devices and send files via the app. EmuDeck also allows you to set up all your emulated games on your SD card, which is wonderful news for those with low storage.
Once you have set up everything, you’ll find all your playable games and emulators inside of the gamemode, just like any other game.
Decky Loader
Decky Loader is an awesome tool that provides a plugin system for the deck, which is feature-rich and easy to use. Here are some of my favorites.
CSS Loader
CSS Loader is a plugin that offers fancy themes for modifying the software’s overall appearance. You can choose between dozens of themes and even apply multiple at the same time.
Game Theme Music
Game Theme Music is a plugin that allows for in-game soundtrack playing when you are looking at a game. For example, imagine you’re considering playing Stardew Valley late at night, and as you hover over the launch button, the soundtrack starts playing—it’s an awesome feeling! While it may be considered useless by some, for many, it brings joy. It sources the soundtracks from YouTube, so you can customize the soundtrack played for each game in the settings accordingly.
Decky Recorder
Decky Recorder is an easy-to-use recording tool, so you can show off your progress, create content, or simply have a way to share media easily. It’s relatively simple to use, and the quality seems good enough for most casual users.
New Operating Systems (Primarily for LCD Models)
While SteamOS by itself can be a bit restrictive, trying out different operating systems can unlock many ways to enjoy your games.
Bazzite (Mouse and Keyboard Required)
Bazzite is a relatively new OS that seems to work on many devices, not just the Steam Deck. It provides a SteamOS-like interface but with a much better desktop experience. Bazzite allows easy one-click installation for many popular gaming-related tools right from the start. It also provides firmware updates and easy access to different package managers, which basically gives you access to a vast amount of software. The integrated updater even manages that software as well. It seems like a great option for tinkers and people who are curious. Also, always remember that if you don’t like an OS, you can easily revert to the stock one by following Valve’s own guide.
Windows
Windows offers one of the most complicated experiences in handheld gaming. While it allows for great compatibility, especially for non-game software or even some Windows-only emulators, the interface is just not optimized for handheld gaming. There are drivers coming directly from Valve, which make the experience far better than stock, but plenty of software is recommended for a great gaming experience.
SteamOS also currently does not support dual-booting, so you need to install Windows either on the SSD housing SteamOS or, if both OSs wish to be kept, install it on the SD card. Installing on an SD card can lower the performance, though.
I’d recommend you watch some videos on the topic beforehand.